Spring is coming, Spring is coming, Spring is coming, never mind that we got snow and had well below freezing temperatures this week. I just know that it will be here before I know it so I am preparing for it now. I couldn't sleep the other night so I decided to do a little Internet window shopping and came across this little ditty which caught my eye, not only because it was cute but because I thought, I could make that. The inspiration dress is by Juicy Couture and while very cute at $88.00 it is definitely more than I am willing to spend on a girls dress. Time to use my "em-agination" and figure out how to make this myself.
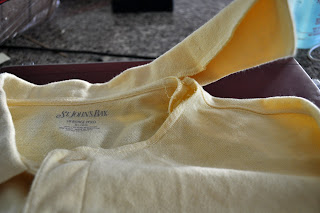
I decided that this dress was a perfect candidate for a clothing refashion. "Clothing Refashion?" you ask, well let me explain. A clothing refashion is when you take and existing piece of clothing that is not longer wanted and turn it into a different item that is. In this case I took an X-large men's polo shirt and refashioned it into a girls dress.
Here is how I did it, not really a tutorial just an explanation of the process. First off, I began by removing the collar of the shirt using a seam ripper.
Second, I found an existing tank top that my daughter owned to use as a pattern for the top of the dress, because it didn't have the skirt, I had to free hand an a-line skirt on the bottom. I wish I had have done a more straight skirt rather than the a-line just because that would have recreated the inspiration dress a little better. For the pattern I used a paper grocery bag that I cut apart.
Once the pattern was drawn and cut out I folded my polo shirt in half and pinned my patten down and cut it out. I left the shoulder seams intact just because it was one less seam to sew.
At this point I sewed up the two side seams and added bias tape made from a ribbed knit around the neck and arm holes.
I then cut a 2 1/2 inch strip of white ribbed knit for the belt. I then ironed the edges over 1/4 inch and added 2 button holes for the tie. Then pin this around the waist of your dress and top stitch around the entire waist of your dress.
Once the belt is top stitched into place I attached two 8 inch pieces of cording/rope to a length of elastic just smaller than my daughter's waist. I then fed the cording and elastic through one of the button holes in the belted middle of the dress using a safety pin attached to the cording to pull the entire length of elastic around the dress and out the other button hole.
Most of the time, I try to use and existing hem when refashioning clothing just because it makes for one less thing to do, unfortunately, this shirt was just a little to long to do that with so I had to cut off the existing hem and create a new one. for this hem, I used an overlock stitch to hem the dress, (similar to the look of what a serger would produce) and left it at that. I however may go back and create a traditional hem to this dress because it still fills a little long on my daughter and my husband says it looks unfinished. We will see, depends on if my daughter will really wear it, right now, she is a little luke warm on the dress. Hopefully when we get warmer weather, she will warm to wearing it. I think it will also look very cute with an added white t-shirt underneath. Here are a few more pics of my daughter being a goof in her dress, please feel free to link back to this post but please don't use my photos without asking, especially one's with my children in them.
And a final comparison of the inspiration dress (on left) and my dress (on right), definately not perfect recreation but that is not what I was going for, I simply used the Juicy dress as a jumping off point, all in all, I am satisfied.


