Showing posts with label kid's. Show all posts

Wednesday, April 13, 2011

Lacing Cards

My kids love lacing cards, oh boy do they ever. The problem is most of them are really pretty flimsy and get bent and ruined pretty quickly, plus it is hard to find ones that are cute or in a theme that your kids may be into. So of course my "em-agination" was sparked and out popped this idea for what I think are some pretty cool lacing cards.
 

Oy Vay...this one wrinkled and tore so much,
I am hoping that with a clear coat it won't be so noticeable.
 

How did I make them you are wondering, well they are really easy and really cheap. First off, I picked up a piece of basa wood at Micheal's that was 4 X 24 X 1/4 inch thick and cut it down into 4 (4 x 6) pieces. I then used my favorite tool, say it with me, the Silhouette craft cutter to cut out my images. The Olivia images are from a new line they just released oh my gosh how cute are they. I simply chose the size I wanted, printed it out and then fed it through the Silhouette where it cut out my image, easy peasy. I did the same with the trucks, another image I bought from the Silhouette online store, print and cut. I then used Modge Podge to glue a 4 x 6 piece of scrapbook paper and my image onto my basa wood and let dry. Once they were dry I measured out my holes and drilled right through all 4 pieces at once. I haven't sealed my cards yet, but I will just to give them a finished look and longer durability, I will probably used a gloss finish such as Diamond Glaze.
I plan on wrapping them up when the clear coat is dry and giving them as a gift. To who you ask??? Well my son's kindergarten teacher gave out a letter at the beginning of the year and asked that through out the year if we wanted to give gifts that we try and give gifts that can be used in the classroom such as donating a book to the classroom library or buying new pencils or markers that often get used up as the year progresses. A great idea I thought and we have done those things for Christmas and such but Teacher Appreciation Week is coming up May 2-6 with May 3rd specifically being Teacher Appreciation Day, so my son will be giving these to his teacher as an appreciation gift, one that can be enjoyed by the whole class.


Monday, April 4, 2011

Cascarones "Confetti Eggs"

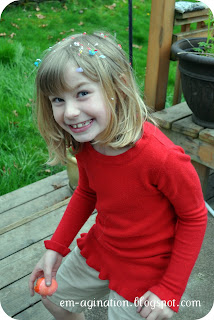
A few years ago a friend of mine who grew up in Mexico with her parents who were missionaries showed me how to make these "Cascarones" or confetti filled eggs for Easter. She said as a child in Mexico, the mothers would make hundreds of these eggs and then hide them for the children to find on Easter morning. Once found, the children would then run around cracking them on other children's heads. I am sure there is more significance to this tradition than I know about, all I know is that my children loved doing this and that our family has started making and hiding these confetti eggs every Easter. Here is how we make them.


Through out the year as I use eggs and remember to do it, I cut the ends of eggs off and rinse out the eggs and set them aside to color later.

As Easter nears, I color all the eggs I have collected using any egg coloring set you find in the grocery store around Easter.


Once colored, I take them out of the dye and allow to dry over night.


Then fill them with paper confetti which you can buy in any party supply store.


To cover the hole and keep the confetti inside, cut a small square of tissue or crepe paper and glue it over the hole using a little bit of watered down Elmer's glue.


Let dry and then hide them as you would an Easter egg.


Then let the fun begin as you watch your children crack the eggs on each other's heads. In our house, the whole family joins in when it comes to the cracking of the eggs. It really is a lot of fun and a good way to get everyone involved in the Easter fun. I don't know about you but as my oldest has matured, I have found it harder and harder to find things to hide in eggs other than money and candy and these eggs have given me yet another thing to keep him entertained and engaged on Easter.

Wednesday, March 9, 2011

Drum for Kids

Those who know my family, know that we are very musical. Let me clarify, everyone but yours truly is musically inclined. My cute hubby is a drummer who actually plays in a local band known as "Over the Edge" who also dabbles in tickling the ivories from time to time. My oldest son is also a drummer who has played a couple of shows with his band "Asylum." My daughter is learning to play the piano and is very good, not that I am biased or anything and if you ask my youngest son who is 5, he will tell you that he is also a drummer. What can I say music runs in their blood. With so many musicians in the house, we have quite a few musical instruments laying around but as you can imagine, little hands are not always welcome to play these instruments so today my son and I decided to make a drum that was all his own. "Woo hoo oh yeah!" to quote my son when we were all done. It is a quick and easy project.

Here is what you need
  • 1 embroidery hoop
  • Ripstop Nylon (I bought 1/4 yard which is enough to make several drums, depending on the size of hoop used)
  • Heat gun or blow dryer
  • Glue (I used Elmer's, oops, I forgot it in the picture)
  • Paint (optional)
                                      
To make this drum, cut a square of fabric that is larger than the hoop.
Place a  line of glue on the outer rim of the inner hoop and a line of glue on the inner rim of the outer hoop. Am I the only one confused by that direction? Basically put glue on that parts that are going to sandwich the fabric.

Lay the fabric over the inner hoop, push the outer hoop around the inner circle and tighten. Pull the fabric that is sticking out of the hoop so that it is very taught and try to tighten the outer circle somemore.

Now take your heat tool or hairdryer and pass it over the fabric. As the fabric heats up you will see it tighten and smooth. Then turn over the hoop and do the same thing.

Trim the excess fabric from around the hoop. Ripstop nylon tends to fray so you make want to take your heat tool around where you cut, this will cause the fibers to melt slightly and stop the fraying.

On to the fun part...the part where you get to use your "em-agination." Take out your paint and decorate that bad boy however you want.

Hand it over to you child and listen as they get their groove on.
Please feel free to link to this post but please do not use my pictures without my permission, especially those with my children in them.

Tuesday, February 22, 2011

Kids can be an Author and an Illustrator

The kids had an extra long weekend because of President's Day which means a lot of questions like, "What can I do, I am bored?" Out comes the art supplies which sometimes means a few minutes of crafting and sometimes means a few hours, this time it meant a few hours with the outcome of a few very cute books.
                        

For inspiration, we used Ed Emberley's Fingerprint Drawing Book. We absolutely love this book and it get used often. This book also makes a great gift when packaged with a multi-colored stamp pad and a sketch pad, a go to gift in our house if we don't have time to make a handmade gift.


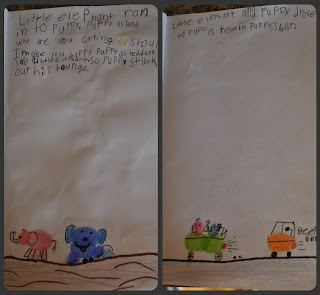
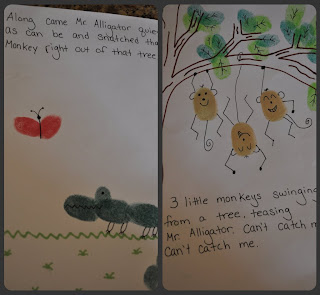
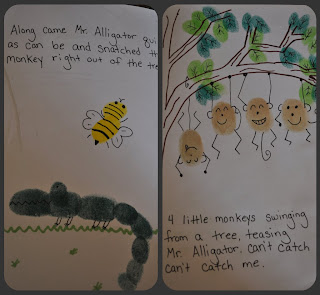
My daughter used her "em-agination" much more than I did and chose to write a couple of original stories "Little, Little Elephant" and "Mouse Visits the Circus" (still a work in progress), I simply chose to illustrate one of my kids favorite little poems "5 Little Monkeys". If your kids are bored, encourage them to write and illustrate their own books, you might be surprised by what they come up with. Here are the books we came up with.